Cookies, those flour-based sweet little cakes you can hold in your hands and enjoy at any event, weren’t meant to be what they are today. It’s supposed that they were first discovered by Persians in the 7th century, one of the first nations to cultivate sugar. But they were created as tiny samples of larger cakes, they weren’t meant to be consumed as they are now. Because sugar was very expensive, cakes were accessible only to the wealthy, thus the baker, not to waste a lot of sugar, created tiny samples which he gave to his wealthy clients and only after being approved he’d go ahead and create the rest.
The history of cookies is closely tied to that of cultivating sugar, thus it wasn’t until the 14th century that cookie recipes show up mentioned in (now) European countries (i.e. Italy, France, UK). In the United States they were first introduced by the Dutch, under the name of ‘koekje’, which literally means ‘little cake’. It wasn’t long until that name evolved to how we now know them, cookies. Not only that we love them, we devour those, as statistics released by the American Institute of Baking show that between 91.7% and 95.2% of US households buy and consume cookies. It’s estimated that annually over 2 billion cookies are eaten in the US along.
Cookies are perfect for travelling snacks, at almost any event (except a Diabetes convention) and they have become basically an intermediate for saying ‘welcome’ as receiving cookies gives you a sentiment of being accepted, rewarded somehow. This is why Girl Scouts in the US have a history of over 96 years of offering cookies to raise funds. They’re rewarding you for helping them, just as many other organizations do – another example would be the ‘cookies for kids’ cancer’ organization, an extraordinary effort to support pediatric cancer research by organizing bake sale events.
Don’t know if it’s the sugar in them or the fact that they’re easy to hide in pockets after ‘stealing’ from grandma’s batch, but kids love cookies. Gingerbread, brownies, chocolate chip cookies, ladyfingers, peanut butter cookies, fortune cookies, animal-shaped, cartoon-shaped – kids love them all but true that some stick to their favorites. And disaster strikes when kids try to cook them alone using real-life ingredients – I remember my own experiment of making brownies that ended in industrial amounts of flour and sugar being wasted and a one week punishment for trashing the kitchen. As a parent be warned that all children will have a ‘wannabe baker’ episode, thus it’s best if you let them bake their own virtual cookies.
Developed by Jaxily, ‘Cookie Maker’ is the app that will let kids bake their own virtual cookies on any Android devices. All without making a single stain on your carpet or table, as all stays within the device. With ‘Cookie Maker’ your kids will be able to mix ingredients, choose a shape for their cookies, bake them and finally add frosting before sharing a photo of the result with their friends.
The app is very simple to use, here are the main steps on how to make a virtual cookie:
- Mix the ingredients. When the process of creating a cookie starts, you’ll have the choice of selecting 4 different ingredients to add to a bowl: milk, flour, butter and eggs. Tap on the corresponding icon on the left and drag the ingredient in the bowl. When all are added use the spoon to mix them, simply tap on the spoon and rotate (without lifting the finger) in the bowl for a little.
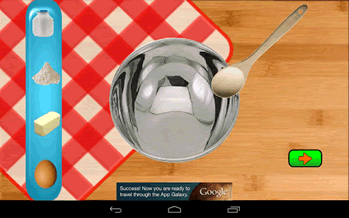
Mix the ingredients in a bowl
- Shape your cookies. In the next step you have to choose a shape and size for the cookie. There are six different shapes available (ginger, star, circle, star, rounded corner star, square) and after you’ve chosen one it’s time to select the size of 3 possible ones (small, medium and large).
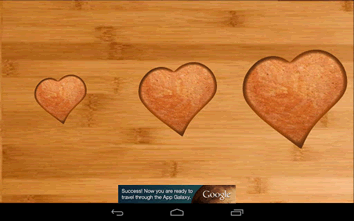
Shape your cookies
- Bake the cookies. Cookies are now ready to be baked. Tap and drag them into the oven and when you’re done start it to bake the cookies (to start the oven just tap on the ‘ON’ green button).

Bake the cookies in an oven.
- Add frosting. The fun part begins as it’s time to decorate the cookies by adding frosting. And there’s no shortage of ideas given that there are 4 different types of frosting each with as many as 16 sub-types, so dozens of possible decoration styles. Tap on a frosting icon on the left, then choose one of the options for that given frosting and start decorating. When everything is done you can share it with friends by tapping on the Mail icon to the right. If you don’t like what you’ve created there’s a reset icon (above the mail one) to start over.
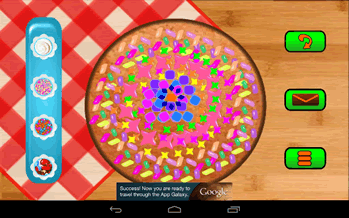
Add frosting to your cookie
The app is easy enough to use, though if you’re more of a watch’n’learn type the video presentation below will help understand better what it does:
Teaching your kids to use virtual cookie makers is a double advantage for your as a parent, not only that you don’t have to clean anything, but they won’t have the extra-energy from eating all those sugary cookies.
The app is free and can be downloaded from Google Play: Download Cookie Maker.


